Zum Inhalt springen
 Trucker hats — with their signature mesh back, foam front, and curved brim — have long been a staple of casual style, blending comfort and character in one iconic accessory. Whether you wear yours for outdoor adventures, daily errands, or streetwear fashion, keeping it clean is essential to preserve its shape, prevent unpleasant odors, and extend its lifespan.
But here’s the challenge: not all trucker hats are made the same, and cleaning them the wrong way can easily warp the brim or ruin the foam front. In this guide, you’ll learn how to clean your trucker hat safely and effectively — from simple hand-washing techniques to spot-cleaning sweat stains, and even when (and how) to use a washing machine without damaging your favorite cap.
Preparations before hand washing the truck hat
Before you start cleaning, take a moment to check the material and care label on your trucker hat — this simple step can make all the difference between restoring your cap or accidentally ruining it.
Most trucker hats are made from a mix of cotton, polyester, foam, and mesh, and each material reacts differently to water and detergent.
- Baumwolle hats can usually handle gentle hand-washing.
- Polyester und Netz caps dry quickly but can lose shape if soaked too long.
- Foam-front trucker hats require special care, as the foam can easily deform or separate when exposed to heat or excess moisture.
Check the care label inside the hat for washing instructions — some may be marked “hand wash only,” while others are machine-safe on a delicate cycle. If there’s no label, always err on the side of caution and hand wash with cool water and mild detergent.
By understanding your hat’s fabric and structure before cleaning, you’ll know exactly which method to use — ensuring your favorite trucker hat stays looking fresh, structured, and ready for your next adventure.
How to Hand-Wash Your Trucker Hat
Hand-washing is the safest, most reliable way to clean a trucker hat while keeping its shape and materials intact. Below are three practical tiers of care — quick daily maintenance, a recommended deep-clean routine, and targeted spot treatments for sweat or stains. Read through before you start so you pick the right method for your hat’s fabric and condition.
Basic cleaning (everyday maintenance)
Keep your trucker looking fresh with a few minutes of light care:
- Dust & surface dirt: Gently brush off loose dust or use a damp microfiber cloth to wipe the foam front and brim.
- Hair and lint: Run a lint roller or a piece of tape lightly across the mesh and crown to pick up hair and fibers.
- Sweatband wipe: After wearing, blot the sweatband with a damp cloth to remove salt and oils — this prevents stains and odors from setting.
- Trocknen: Always air dry. Pat excess moisture with a towel and let the hat dry on a flat surface or over a small bowl to preserve shape. Avoid direct sunlight and never use a dryer.
Deep cleaning (hand-wash — recommended)
When your hat needs a thorough clean (smells musty, visible grime), follow these step-by-step instructions:
- Prep: Fill a basin or sink with cool to lukewarm water (not hot). Hot water can warp brims and damage adhesives.
- Mild cleaner: Add a small amount of mild detergent or baby shampoo — just enough to make light suds (a teaspoon or so per liter of water is plenty). Avoid bleach or strong stain removers that can fade colors or eat foam.
- Soak briefly: Submerge the hat for 5–10 minutes if it’s just dirty. For foam-front hats, do nicht soak for long — instead keep the foam side out of direct submersion and focus cleaning on the sweatband and rim.
- Gentle scrubbing: Use a soft-bristled toothbrush or soft cloth to lightly scrub the sweatband, inner crown, and brim edge. Be gentle on logos and embroidery. Concentrate on stained areas but avoid aggressive scrubbing that crushes the foam or stretches the mesh.
- Rinse thoroughly: Rinse under cool running water until no soap remains. Soap residue attracts dirt and can stiffen fibers if left behind.
- Reshape while damp: Gently press out excess water with a towel — don’t wring or twist. Place the hat on a rolled towel, small bowl, or hat form to maintain the crown and brim curve. If the brim needs shaping, mold it by hand while damp.
- Air dry fully: Let the hat dry in a well-ventilated, shady spot. Drying can take 12–24 hours depending on humidity — be patient. Avoid heat sources and sunlight that cause fading or shrinkage.
Pro tips: do a colorfastness test in an inconspicuous spot before full cleaning; if the hat has glued parts (foam front), keep submersion minimal.
Spot cleaning (sweat stains, makeup, oil)
Targeting stains saves time and reduces full-wash frequency:
- Mild soap method: Mix a few drops of gentle detergent with warm water. Dip a soft toothbrush or cloth and work the stained area in small circles. Rinse with a damp cloth and pat dry.
- Baking soda paste (good for deodorizing): Make a paste of baking soda + water, apply to the sweatband or yellowed areas, let sit 10–20 minutes, then brush lightly and rinse. Baking soda both lifts stains and neutralizes odors.
- Stronger stain treatment (use cautiously): For stubborn yellow sweat stains on white hats only, a paste of baking soda + a small amount of hydrogen peroxide can help — apply briefly, test first on a hidden seam, then rinse thoroughly. Avoid peroxide on colored fabrics without testing.
- Oil or makeup: Sprinkle cornstarch or baby powder on fresh oil marks to absorb grease; let sit 15–30 minutes, brush off, then spot-clean with mild soap if needed.
How to Machine-Wash Trucker Hats
Machine-washing a trucker hat can be convenient — but it’s also risky. Only attempt it when the hat’s care label and construction allow (no delicate foam fronts, glued brims, or vintage pieces). When done properly, a machine wash can remove grime without wrecking the shape; done poorly, it’ll flatten the brim, separate glued parts, or distort the crown. Follow these six steps for the safest results.
1. Pre-treat the hat
- Inspect first. Check the care label and construction. If the hat has a foam front, glued components, or elaborate embroidery, skip the machine and hand-wash instead.
- Remove loose debris. Brush off dust and lint, or use a lint roller on the mesh and crown.
- Spot-treat stains. Apply a small amount of mild liquid detergent or a paste of baking soda + water to sweatbands, makeup marks, and oil spots. Gently work the stain with a soft toothbrush, then blot with a damp cloth.
- Test auf Farbechtheit. Dab a little diluted detergent on an inside seam; if dye runs, don’t machine wash.
2. Set the water temperature
- Use cold or cool water only. Cold water reduces shrinkage, fading, and adhesive breakdown. Aim for water below about 30°C (86°F) — hot water is a fast way to warp brims and ruin glued parts.
3. Use the correct detergent
- Choose a mild, liquid detergent. Powder detergents can leave residue; pods can be too concentrated.
- No bleach or fabric softener. Bleach weakens fibers and discolors, and fabric softener can coat mesh and reduce breathability.
- Use a small amount. Less soap means easier rinsing and less chance of stiffening the fabric.
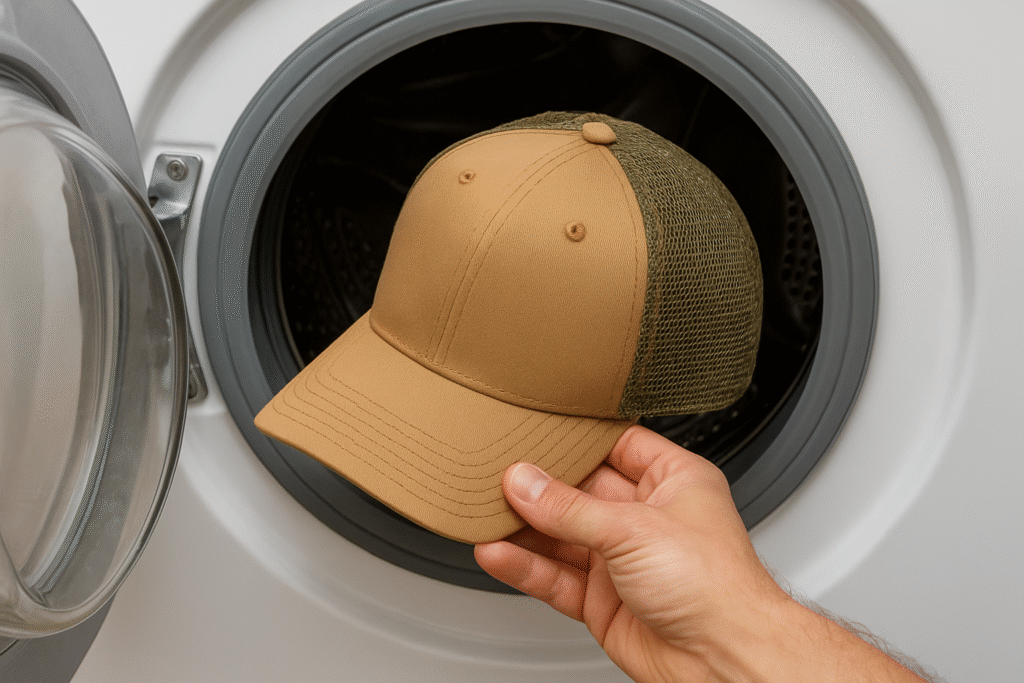
4. Place the hat into the machine
- Use a hat cage or cap frame if available. These commercial “cap savers” hold the crown and brim in shape during the cycle — the safest option.
- If you don’t have a cage: put the hat inside a mesh laundry bag or a pillowcase and tie/zip it closed. To protect shape, place the bagged hat between two towels so the drum won’t slam directly into the brim.
- Balance the load. Wash with a small load (a couple of towels) to keep the drum balanced; do not overload the machine. Never wash a single hat with nothing else in the drum.
5. Choose the correct cycle
- Delicate/gentle cycle mit einer short wash and low or no spin is ideal. High spin speeds can bend brims and deform the crown.
- Keep the cycle brief. A short, gentle cycle minimizes agitation and water exposure — enough to clean without stressing the hat.
6. Air-dry and reshape
- Never use a dryer. Heat will warp brims, shrink fabric, and can separate glued parts.
- Remove promptly and reshape while damp. Press out excess water with a towel (don’t wring), then place the hat on a rounded form — a small bowl, a rolled towel, or a proper hat form. Mold the brim and crown back to their original shape.
- Dry in shade with good airflow. Avoid direct sunlight (fading) and heat sources (glue damage). Allow plenty of time — often 12–24 hours depending on humidity.
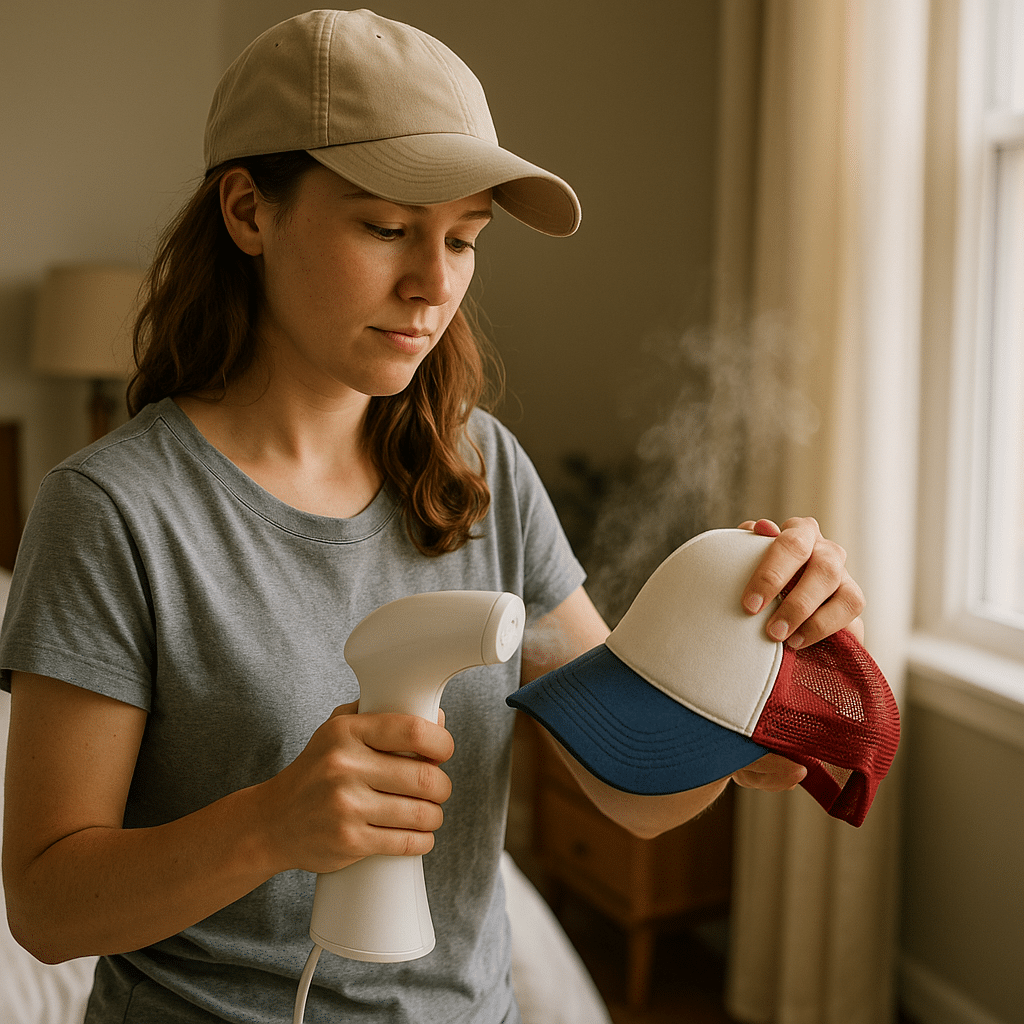
- Fix a flattened brim: If the brim creases after drying, lightly steam (from a distance) or hold it over a hot shower’s steam, then reshape and let cool in position. Test carefully—steam + heat can loosen glue, so use sparingly.
Schlussfolgerung
Sumkcaps tell you, keeping your trucker hat clean isn’t just about appearance — it’s about preserving its structure, comfort, and lifespan. Whether you prefer a gentle hand wash or the occasional machine rinse, the key is understanding your hat’s materials and treating them with care. Hand-washing remains the safest method for maintaining shape and color, while machine-washing works only for sturdier, fabric-based designs. Always air dry, avoid harsh heat, and reshape while damp to keep that perfect fit. With a little attention and the right technique, your favorite trucker hat can stay fresh, crisp, and ready for every adventure ahead.